Engine Installation
SAFETY FIRST: Protective gloves and eyewear are recommended at this point.
Use new nuts with the engine mounting bolts.
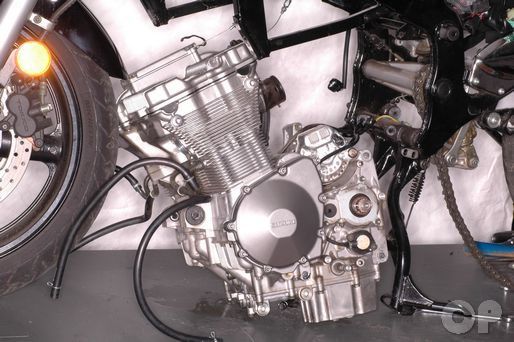


Position the engine on a jack and guide it into the frame.


Use the jack to help you move the engine to line up its mounts.


Apply blue Loctite to the threads of the lower engine mounting bolt. Insert the lower engine mounting bolt from the left side of the frame and thread on the nut.


Insert the upper engine mounting bolt through the left side of the frame. Position the spacer between the engine and the right side of the frame. Thread the nut onto the bolt.


Hold the bolts with a 14 mm socket and torque the nuts to specification with a 14 mm socket.
(Rear Engine Mounting Nut Torque: 75 N-m or 54 lb-ft)
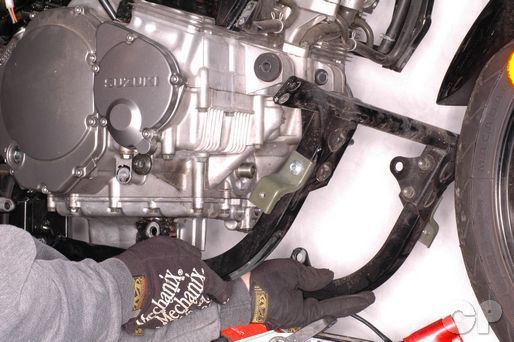


Fit the frame down tube section around the engine.


Insert the front engine mounting bolts from the outside of the down tube and thread on the nuts.
Install the two (each side) rear down tube nuts and bolts. Hold the nuts with a 12 mm wrench and tighten the bolts to specification with a 12 mm socket.
(Rear Down Tube Nut and Bolt Torque: 32 N-m or 23 lb-ft)


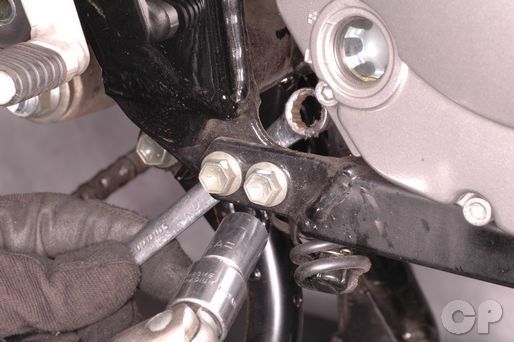
Apply blue Loctite to the threads of the lower engine mounting bolts. Install the lower engine mounting bolts. Tighten the bolts to specification with a 12 mm socket.
(Lower Engine Mounting Bolt Torque: 55 N-m or 40 lb-ft)


Hold the front engine mounting nuts with a 14 mm wrench and torque the bolts to specification with a 14 mm socket.
(Front Engine Mounting Bolt Torque: 55 N-m or 40 lb-ft)


Install the upper down tube mounting bolts. Tighten the bolts to specification with a 12 mm socket.
(Upper Down Tube Bolt Torque: 32 N-m or 23 lb-ft)
Install the oil cooler. See the Oil Cooler topic for more information.
Install the countershaft sprocket and clutch pushrod. See the Countershaft Sprocket topic for more information.
Install the gearshift pedal. See the Gearshift Pedal topic for more information.


Install the starter motor lead to the starter motor. Tighten the bolt securely with an 8 mm socket. Slide the rubber cover into place.


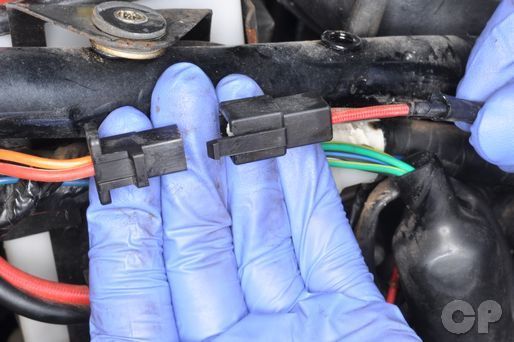
Plug in the signal generator and the oil pressure switch connectors.


Plug in the side stand switch connectors.


Cover the connectors with the rubber cover.


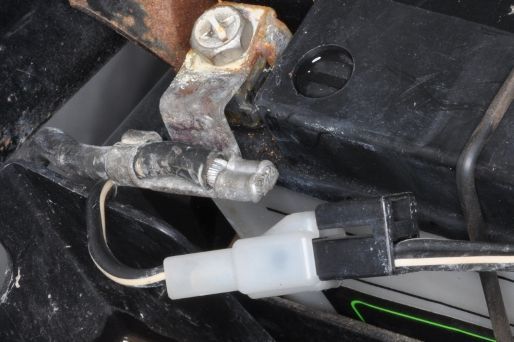
Plug in the neural switch connector.


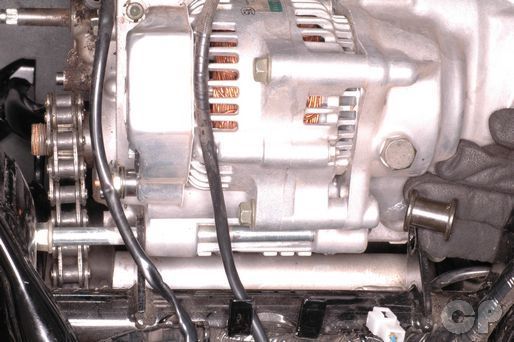
Route the generator wires from the left side of the engine up to the base of the sub frame on the right side secure the wires along with the rest of the harness with wire bands.
Plug in the generator connector.


Secure the wires to the sub frame with wire bands.
Install the battery. See the Charging System topic for more information.
Plug in the negative battery connector.
Install the spark plug caps. See the Spark Plug topic for more information.
Install the carburetors. See the Carburetor topic for more information.
Fill the engine oil. See the Engine Oil topic for more information.
Install the exhaust system. See the Exhaust System topic for more information.
Install the upper fairings. See the Upper Fairings topic for more information.
Install the lower fairings. See the Lower Farings topic for more information.
Install the seats. See the Seats topic for more information.
Copyright 2025 - Cyclepedia Press LLC

Note: If you are viewing this document offline be sure to visit the latest version online at http://www.cyclepedia.com before attempting any repairs. Updates are made without notice.